
RIDGID 1017 basin wrench
$44.95 at Amazon
Check it on AmazonPrice as of Oct 24, 2026, 5:30 AM EDT

Check the fit first, then set, connect and flush it in the makers’ order.
As an Amazon Associate I earn from qualifying purchases.
Shut both stops, open the faucet, then take the old one out. Set the new one on its gasket or putty and snug the nuts by hand. Connect braided lines, then remove the aerator and run hot and cold for 15 seconds.
Count the holes in your sink, pick the faucet you bought and look at its inlets. The checker tells you what else to buy.
Most failed faucet installs fail at the store, not under the sink. The faucet doesn’t match the holes, or the supply lines are the wrong thread or too short. Five minutes with a flashlight and a tape measure saves a second trip.
For kitchen sinks, the kitchen faucet hole size guide covers hole diameters and spreads in detail. If you’d rather price the job out first, see what it costs to install a faucet.
Beyond an adjustable wrench, a bucket and a flashlight, this is what a faucet swap needs. You need one of the two connectors, not both. I’ve used every item in this kit.


Product prices and availability are accurate as of the date/time indicated and are subject to change. Any price and availability information displayed on Amazon.com at the time of purchase will apply to the purchase of this product.
| Item | Key specs | Pick it if | Skip it if |
|---|---|---|---|
| RIDGID 1017 basin wrench | Shank telescopes 10 to 17 in.; jaw fits 3/8 to 1-1/4 in.; head holds up to 90° | You’re removing or tightening mounting nuts tucked behind the bowl. | Your new faucet tightens from above or with its own tool, and the old nuts come off by hand. |
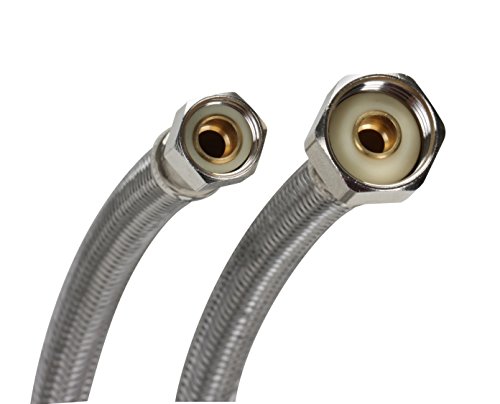
| Fluidmaster B6F20 | 3/8 in. female compression both ends, 20 in., braided stainless, 5-year warranty | Your faucet’s attached lines are short, or its inlets are 3/8 in. compression. | The faucet has 1/2 in. threaded shanks. Get the B1F30 below. |
| Oatey 31177 stain-free putty | Non-staining; Oatey lists granite, marble, quartz and Corian; cleans up with soap and water | The sheet calls for putty under the base, a deck plate or a drain flange. | The faucet comes with a rubber deck gasket. Use the gasket and follow the sheet. |
| Fluidmaster B1F30 | 3/8 in. female compression × 1/2 in. female iron pipe, 30 in., braided stainless, 5-year warranty | Your faucet has 1/2 in. threaded shanks and no lines attached, or the stop sits far from the inlets. | The faucet’s inlets are 3/8 in. compression. Use the B6F20. |
The basin wrench is the one tool most homes don’t own. Its jaw swivels at the end of a long shank, so you can reach a nut behind the bowl that no other wrench can turn. RIDGID lists a lifetime warranty on the 1017.
On supply lines, measure before you buy. The faucet side and the stop side often use different threads. The braided faucet supply lines guide has a full size chart.
The type decides how many holes it needs and how it mounts.
| Type | Holes | How it mounts | Where you see it |
|---|---|---|---|
| Single-hole | 1 (plate covers 3) | One shank and nut, often a mounting bracket | Most new kitchen and many bathroom faucets |
| Centerset | 3, outer holes 4 in. apart | One body; two nuts on the handle shanks | Bathroom sinks |
| Widespread | 3, outer holes usually 8 in. apart | Spout and two valves mount separately, joined by hoses | Bathroom sinks with more room |
Moen’s two-handle lavatory sheet (INS2227) shows the widespread build: separate hot and cold valve bodies, each with its own mounting washers and nuts, and a hose joining them to the spout. That’s three mounting points to set instead of one, so allow more time.
Wall-mount faucets are a different job: the valves sit inside the wall. They’re out of scope here, and they need the wall opened for any change.
Empty it, put a towel down and set a bucket under the stops.
Turn the hot and cold shutoff valves under the sink clockwise until they stop.
Moen’s sheets say to open the faucet handle to relieve pressure and confirm the water is fully off.
Photograph the old connections so you know which line went where.
If water still runs with both stops closed, or a stop leaks at its stem, fix that first. Shut the main and replace the stop.
Old multi-turn stops often don’t close all the way. If yours drip, the how to shut off your water main guide gets you to the main. Replacing the stops while the faucet’s out is a good idea anyway, since you’ll have the space.
Loosen the nuts at the stops first, then at the faucet. Let them drain into the bucket.
Kitchen: unclip the side spray or pull-down hose from its connector. Bathroom: loosen the lift-rod strap from the pop-up rod.
Reach up behind the bowl with the basin wrench. Penetrating oil on rusted threads helps.
Rock it gently to break the old putty or caulk.
Scrape off old putty and caulk with a plastic scraper, then wipe the surface clean and dry.
Corroded nuts are the slow part of this job. If a plastic nut won’t turn, it can be cut with an oscillating tool or a hacksaw blade, carefully, keeping clear of the sink.
On a pull-down kitchen faucet, note where the hose weight sat. You’ll need the same clearance under the new one.
Moen’s sheets call for plumber’s putty or another sealant under the base. Many faucets ship with a rubber gasket instead.
| What the faucet came with | What to do | Source |
|---|---|---|
| A putty groove on the mounting washers | Fill the groove with putty, flip the washer and set it on the sink | Moen INS2227 |
| Nothing under the spout base | Run a bead of putty or other sealant under the base | Moen INS1620C |
| A rubber or foam deck gasket | Use the gasket alone; follow its sheet | My call; check your sheet |
| A stone, quartz or solid-surface counter | Use a non-staining putty or silicone | Oatey 31177 listing |
Attach any lines or hoses that are easier to connect before the faucet goes in.
Gasket, putty or sealant, as the sheet says.
Lower the faucet and its lines through the hole and square it to the backsplash.
Moen INS1563B: secure the faucet to the deck by hand-tightening the mounting nuts.
Have someone hold it straight from above, then snug the nuts. Don’t crank.
Clean away the putty that oozes out around the base.
Regular putty can leave an oil stain on natural stone. Oatey sells 31177 as non-staining and lists granite, marble, quartz and Corian. For the choice between putty and silicone, see plumber’s putty vs silicone.
If the faucet rocks after a few weeks, the nuts have settled. How to tighten a loose faucet base covers that fix.
Match each end’s thread, then tighten the way the connector maker says.
| Faucet inlet | Stop outlet | Connector to buy |
|---|---|---|
| Attached lines with 3/8 in. compression nuts | 3/8 in. compression | None, or a 3/8 × 3/8 extension such as Fluidmaster B6F20 |
| 1/2 in. threaded shank (IPS) | 3/8 in. compression | 3/8 in. compression × 1/2 in. FIP, such as Fluidmaster B1F30 |
| Copper tube tails | 3/8 in. compression | A connector made for tube tails; see our supply line guide |
Measure stop to faucet inlet along the path the line will take, then add a little slack. A tight line pulls on both ends.
Fluidmaster’s sheet says to remove the old connector and clean all connector threads.
Fluidmaster: thread the metal nut onto the shutoff valve and tighten 1/2 turn beyond hand-tight.
Fluidmaster’s Click Seal sheet: turn the plastic nut by hand until it clicks. The click means it’s sealed.
Facing the sink, hot goes to the left inlet and cold to the right.
Fluidmaster rates that Click Seal connector at 15 to 20 inch-pounds of torque. That’s light; it’s easy to overdo a compression nut with a big wrench. Stop at the turn the sheet gives, then tighten more only if it weeps.
Don’t put thread tape on compression threads. The seal is the ferrule or rubber cone inside the nut, not the threads. The Teflon tape vs pipe dope vs putty guide explains where each sealant belongs.
Many bathroom faucets include a new pop-up drain. These steps follow Moen’s INS2227 sheet.
Clean the drain opening and put putty or other non-staining sealant under the drain seat.
From below, slide the gasket on tapered side up, then the washer and nut. Hold off on full tightening.
Thread the tailpiece on with its o-ring and turn it so the pivot opening faces the wall. Then tighten the nut.
Drop the lift rod in through the spout and clamp the strap finger-tight; adjust once the stopper works.
If the stopper sticks or won’t seal later, the bathroom sink stopper not working guide walks through the linkage. Plastic drain parts shouldn’t get putty unless the sheet says so; use the gasket supplied.
Moen: unthread it by hand, or with the aerator tool some models include.
Turn each stop on a little at a time while you watch the connections.
Moen’s flushing step clears debris knocked loose in the pipes.
Thread it back on by hand.
Run a dry paper towel around each nut; it shows a weep you can’t see.
Skipping the flush is the usual cause of weak flow from a brand-new faucet. Bits of scale and solder lodge in the aerator screen or the cartridge inlet. Check again an hour later and the next morning. Slow leaks under a sink show up as a damp cabinet floor days later.
| Problem | Likely cause | What to do |
|---|---|---|
| Drip at the stop nut | Not quite tight, or old ferrule | Fluidmaster: tighten just enough for a leak-free joint; don’t overtighten |
| Drip at a plastic nut | Cross-threaded or overtightened | Back it off, re-thread straight, hand-tight only |
| Low flow on one side | Debris in the aerator or inlet | Remove the aerator, clean the screen, flush again |
| Faucet turns or rocks | Mounting nut not snug | Snug it from below; see our loose base guide |
| Water under the base on the counter | Gap in the putty or gasket | Reset the faucet with a fresh seal |
| Hot and cold reversed | Lines swapped | Swap the lines at the stops |
When to call a plumber: stops that won’t close and can’t be replaced, corroded pipe that crumbles when you touch the stop, or a sink that needs new holes in stone. Those aren’t faucet jobs any more.
Yes, a standard deck-mount faucet with working stops is a homeowner job. Call a plumber if the stops won’t shut off or the pipes are corroded.
An adjustable wrench, a basin wrench for nuts behind the bowl, a bucket, a flashlight, and putty or the supplied gasket. Most faucets need new supply lines too.
Only if the sheet calls for it. Moen’s sheets call for putty or other sealant under some bases. If a rubber gasket is supplied, use the gasket.
Usually. Many faucets have lines attached that go straight to the stop. Faucets with threaded shanks need 3/8 in. compression × 1/2 in. FIP connectors.
Fluidmaster’s sheet says a metal nut gets hand-tight plus 1/2 turn, and its Click Seal plastic nut is turned by hand until it clicks.
Facing the sink, hot is on the left and cold on the right.
Usually debris in the aerator. Remove it, clean the screen, and run hot and cold for 15 seconds as Moen’s flushing step says.
Not on compression connections. The seal is inside the nut. Follow your faucet’s sheet for any threaded shank connections.
I’m Isaac Daniels, a licensed journeyman plumber in Georgia (license #JP507711), and I’ve used every item in the kit. The steps come from Moen installation guides and a Fluidmaster connector sheet, read on Oct 23, 2026. Where I add my own advice, it’s labeled.